Partimos del manual anterior. Pueden consultarlo aqui
Se pretende llegar a este diagrama:
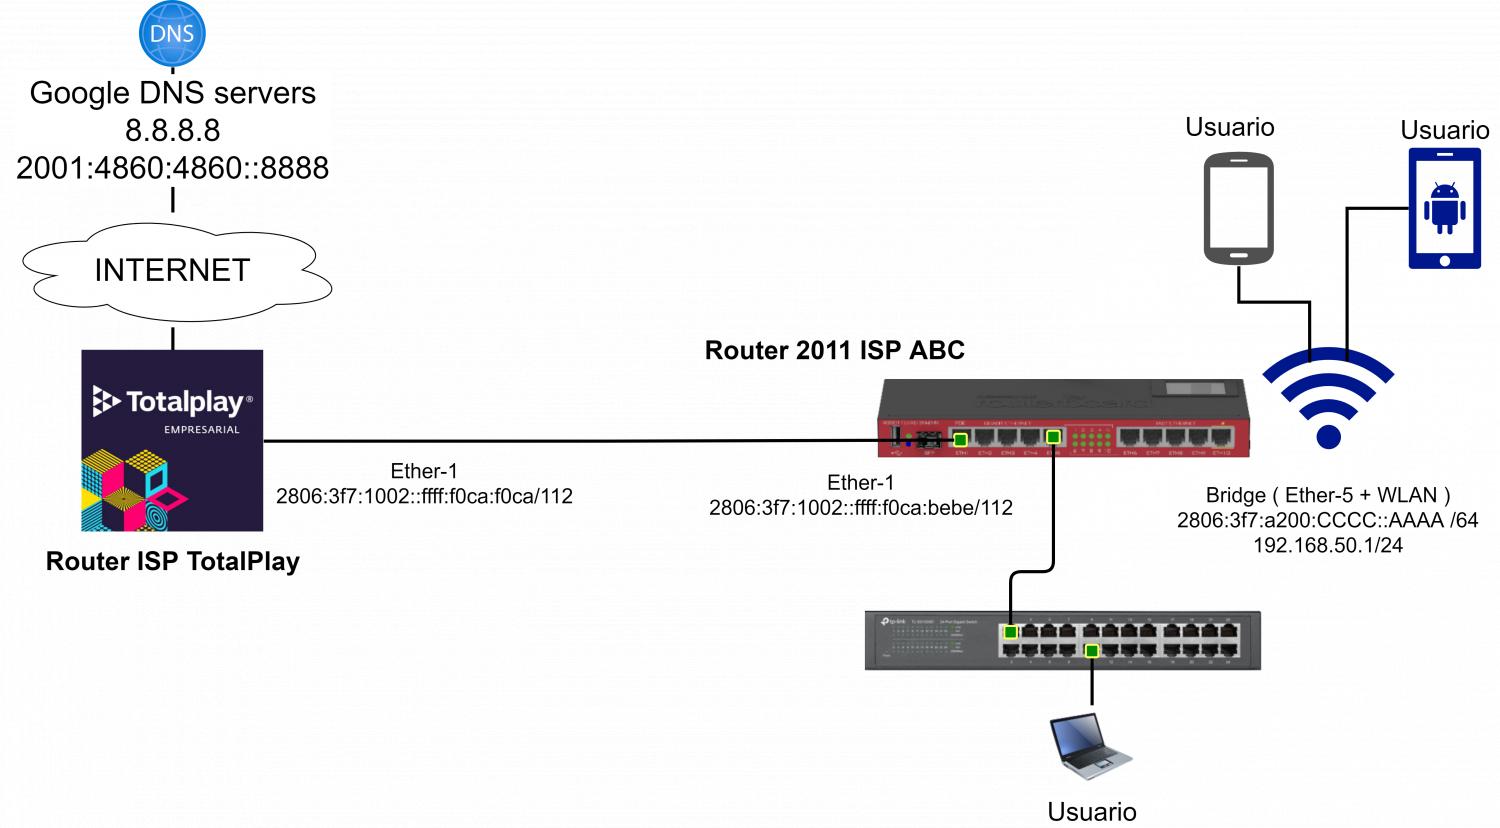
| EQUIPO |
INTERFACE |
Direción IPv4 - IPv6 |
Descripcion |
| ROUTER ISP ABC |
ETHER-1 |
2806:3F7:1002::FFFF:F0CA:BEBE /112 |
Enlace con nuestro proveedor |
| ROUTER ISP ABC |
BRIDGE |
2806:3F7:A200:CCCC::AAAA/64 |
Esta interface va conectada a un switch capa 2 |
| ROUTER CARRIER TOTAL PLAY |
ETHER-1 |
2806:3F7:1002::FFFF:F0CA:F0CA /112 |
Esta IPv6 va a ser nuestro gateway |
| Laptop Usuario |
Ethernet |
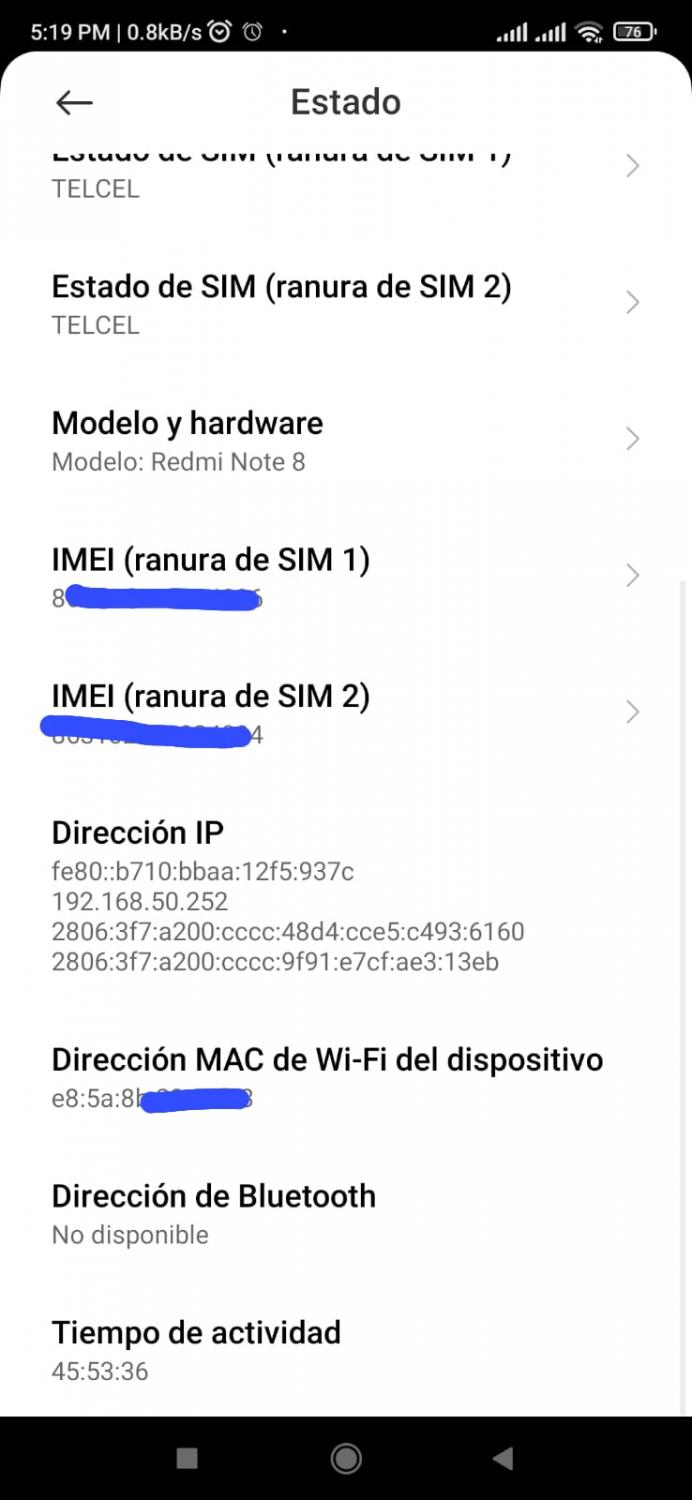
2806:3f7:a200:cccc:3af6:45f1:e117:b58 /64
192.168.50.200 /24 |
Esta IPv6 nos la entrega el Mikrotik |
¿Qué vamos a realizar?
- Crear una interface Bridge.
Esto tiene la finalidad de tener el mismo prefijo IPv6 tanto para los usuarios conectados por un cable como para los usuarios de Wi-Fi - Cambiar el direccionamiento
Solo tenemos que cambiar la dirección IPv6. Ahora esta IPv6 estará asignada a nuestra nueva interface Bridge. - Configurar interface WLAN
Crearemos una red Wi-Fi para que los usuarios se puedan conectar al Mikrotik. - Probar la configuración
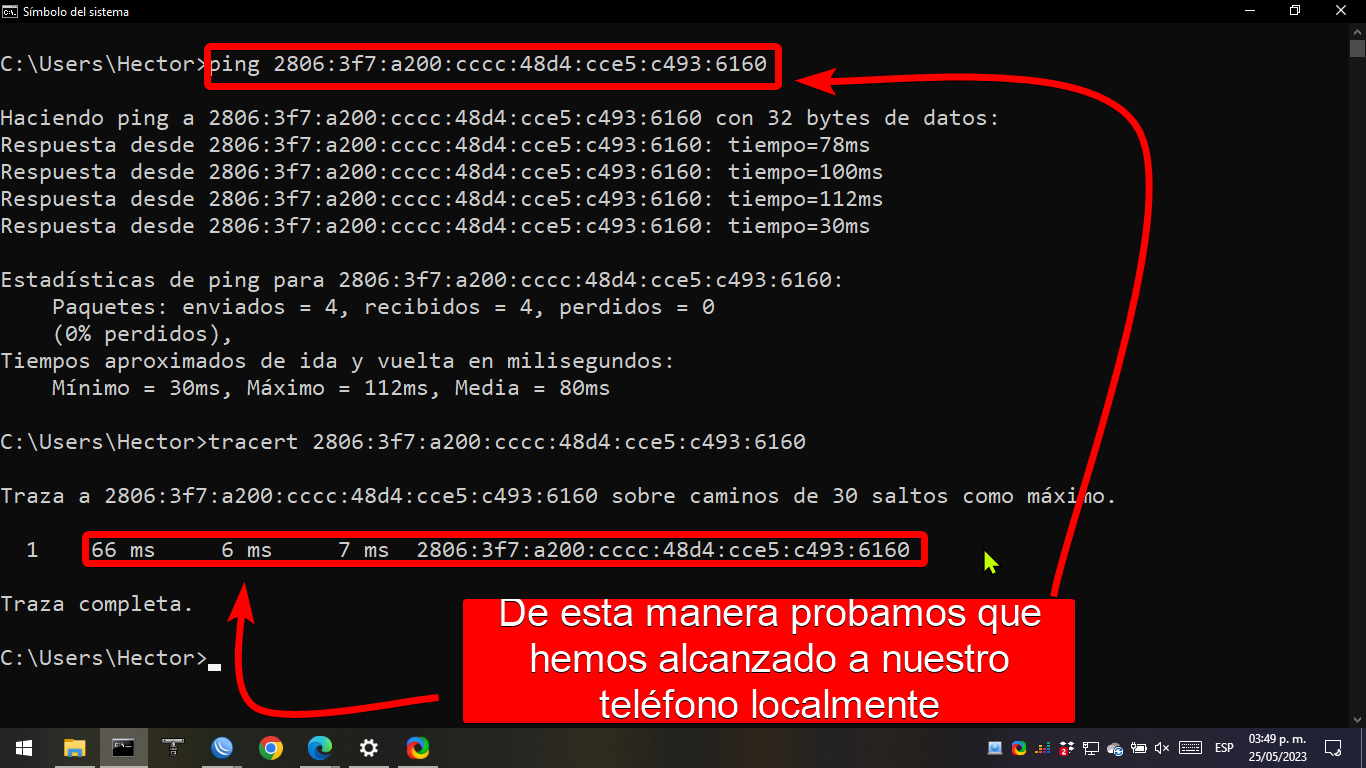
Haremos pings entre nuestros equipos usando IPv6 para demostrar que nuestro bridge esta funcionando correctamente.
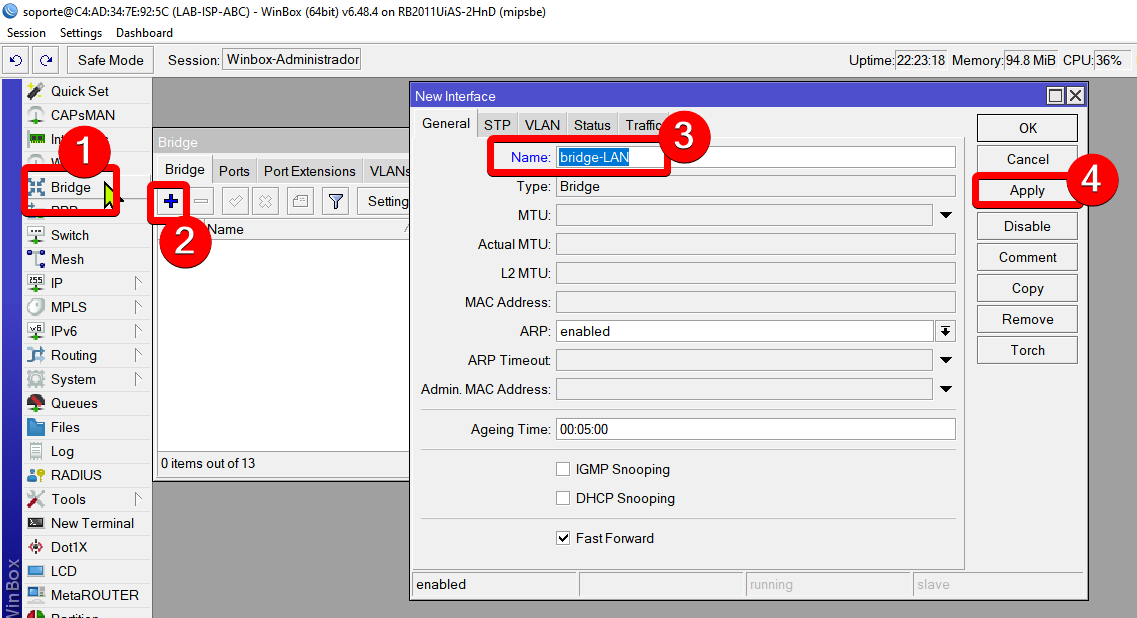
1 Crear una interface Bridge
Código:
/interface bridge
add name=bridge-LAN
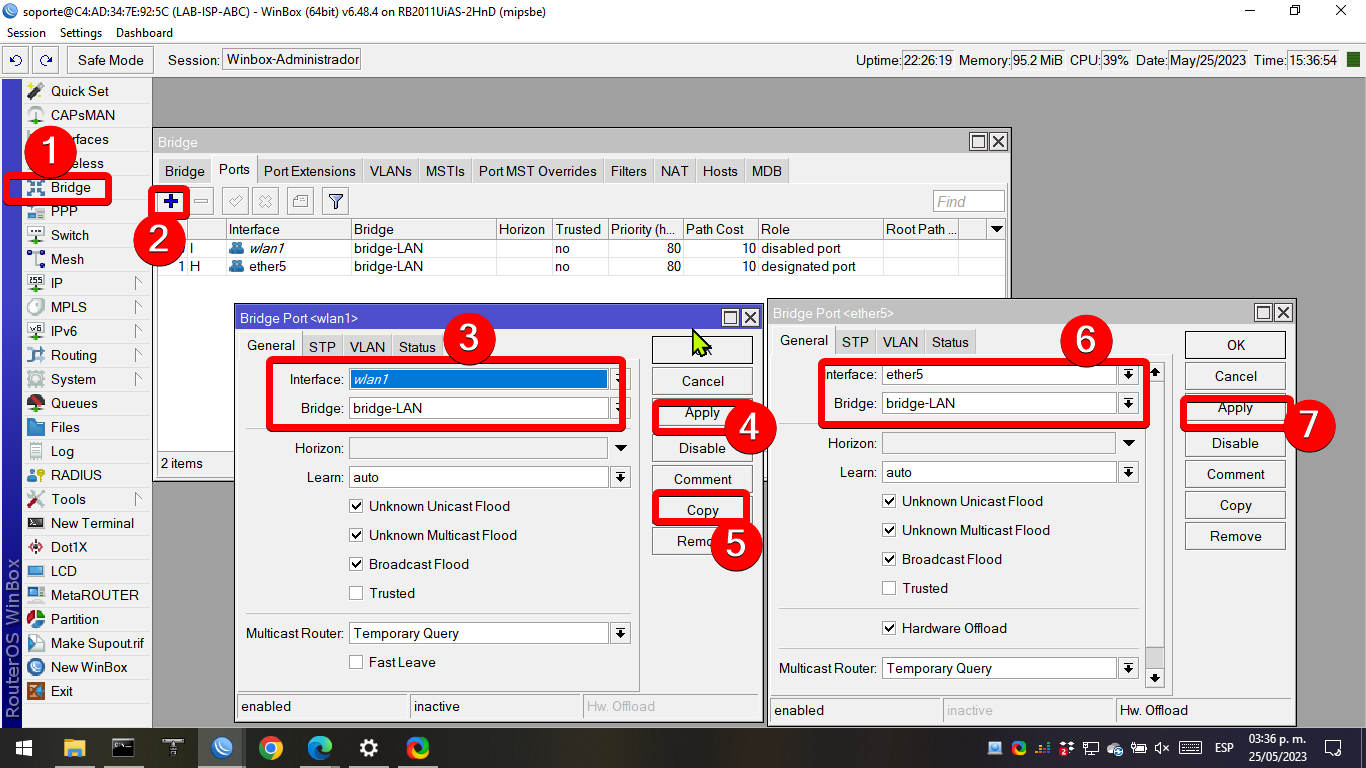
1.1 Añadir interfaces a nuestro Bridge
Código:
/interface bridge port
add bridge=bridge-LAN interface=wlan1
add bridge=bridge-LAN interface=ether5
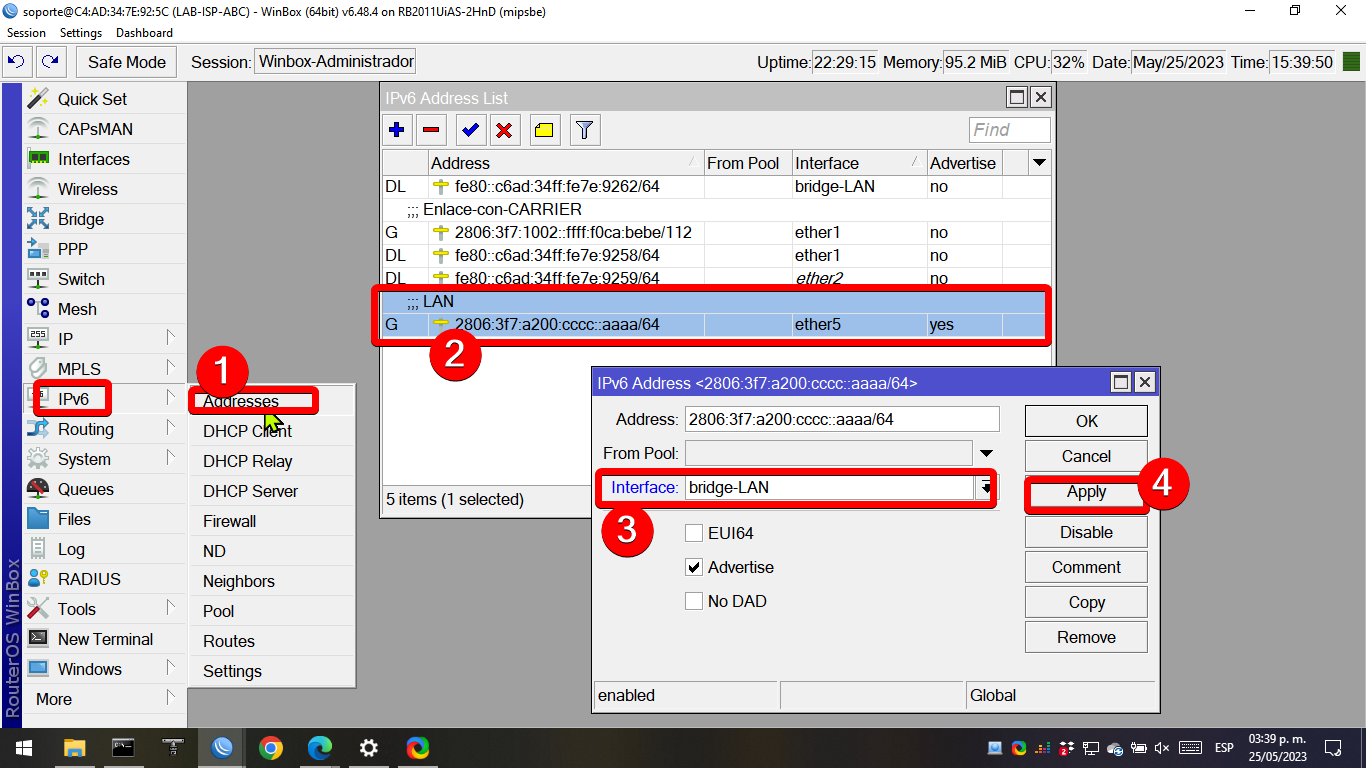
2 Cambiar el direccionamiento
Código:
/ipv6 address
add address=2806:3f7:a200:cccc::aaaa comment=LAN interface=bridge-LAN
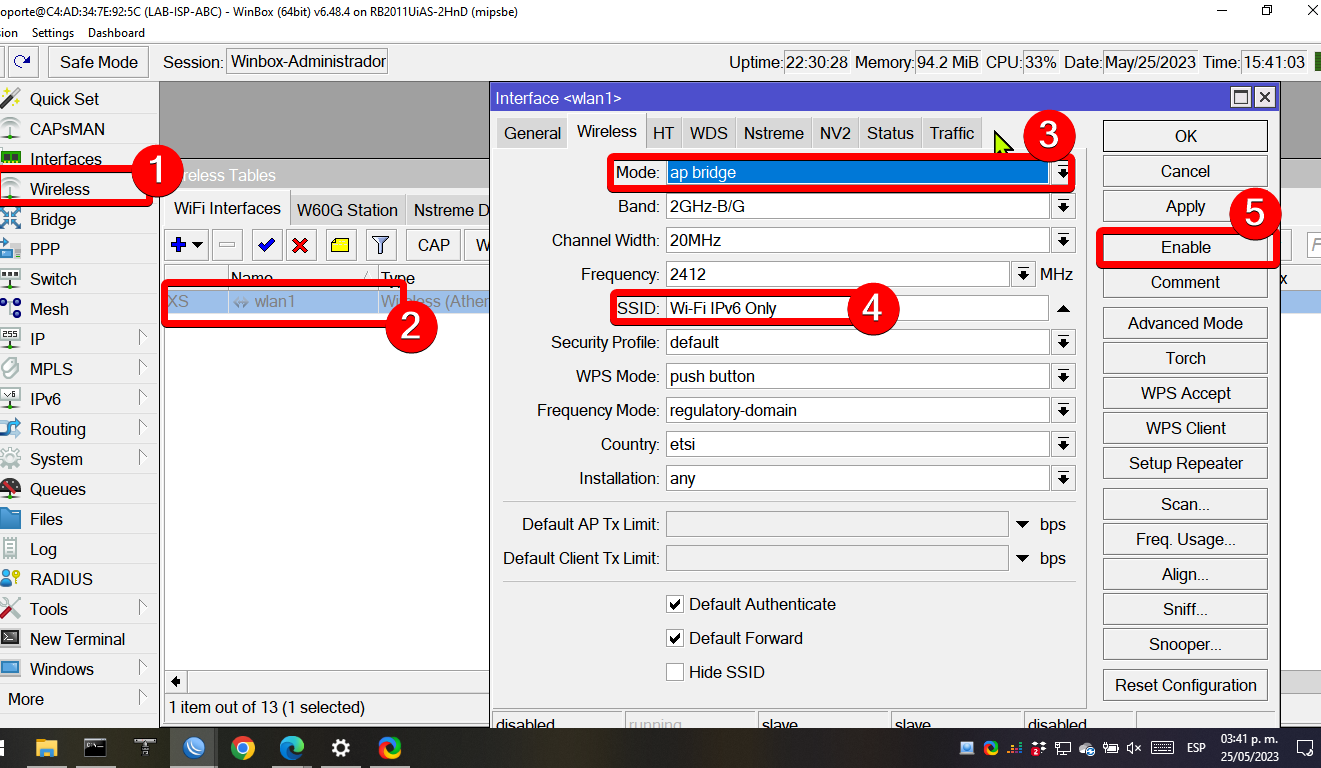
3 Configurar interface WLAN
Código:
/interface wireless
set [ find default-name=wlan1 ] disabled=no mode=ap-bridge ssid="Wi-Fi IPv6 Only"
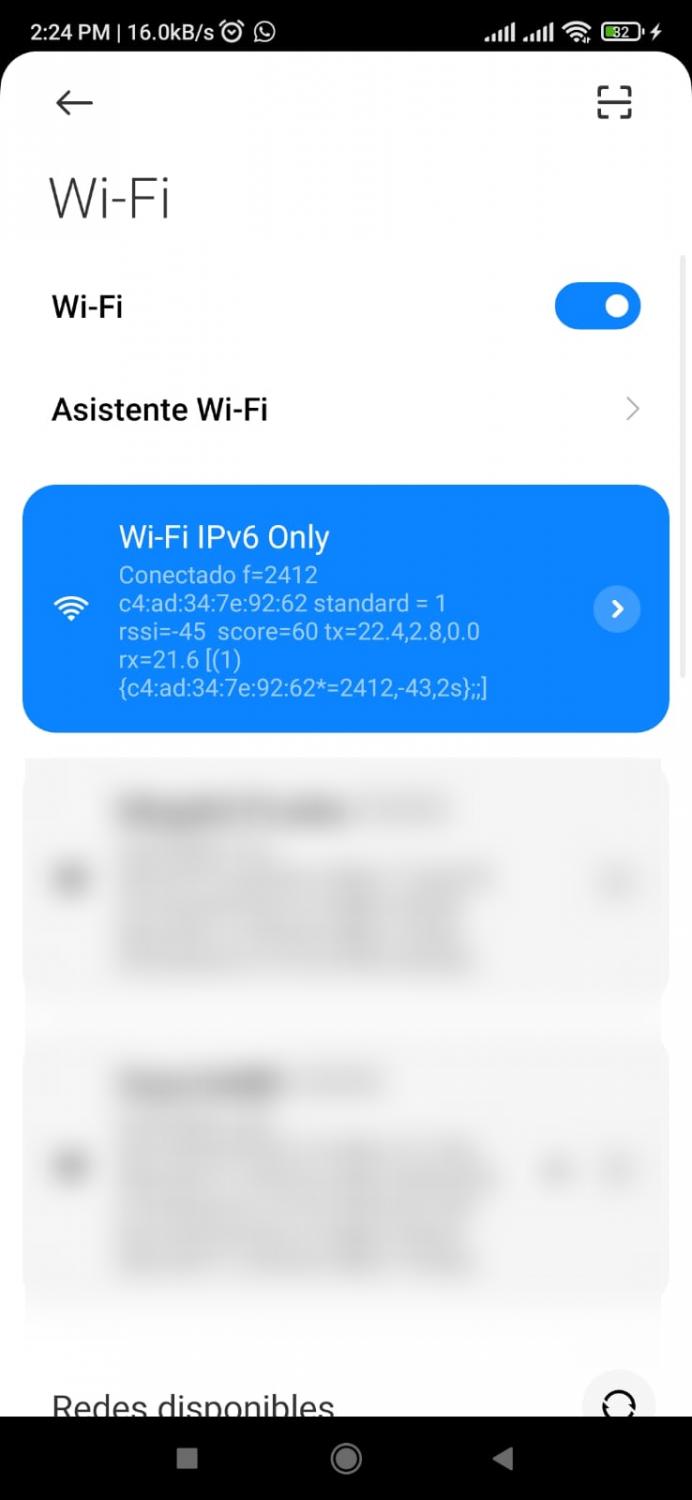
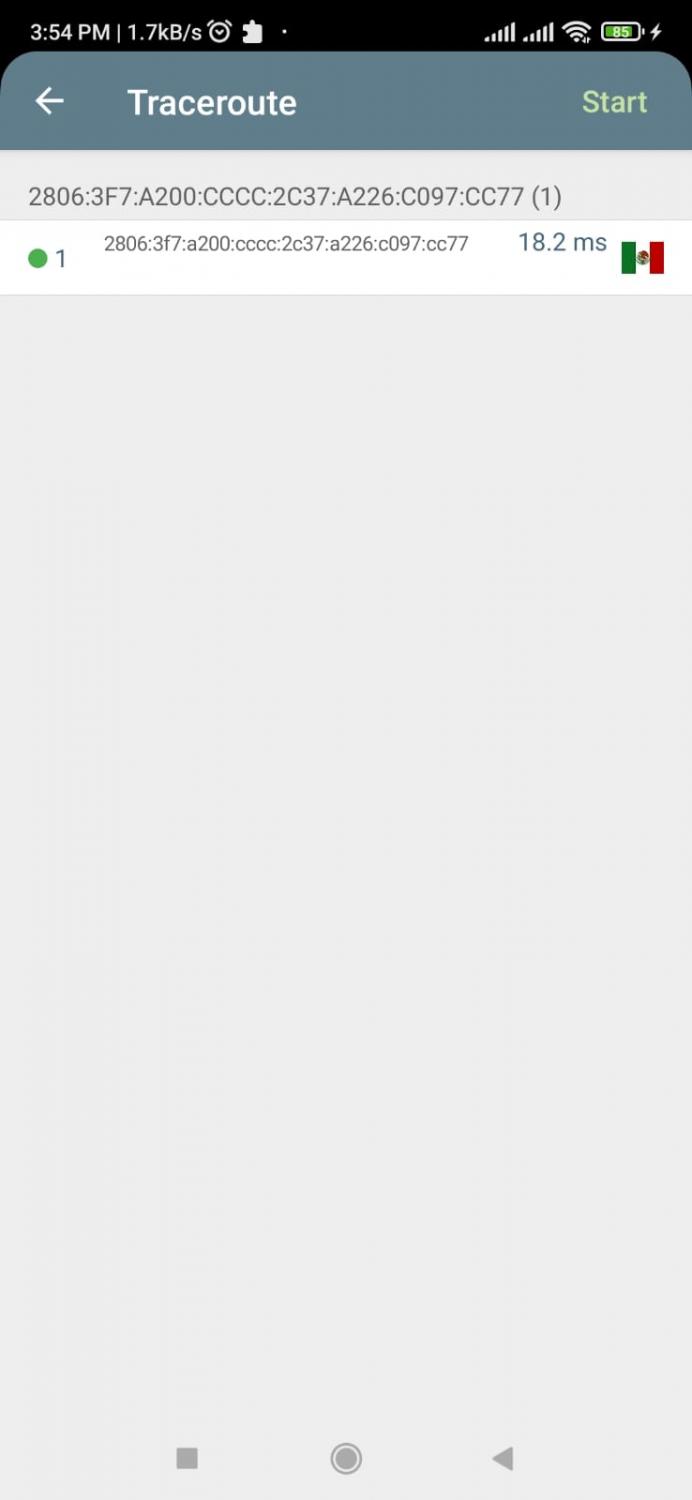
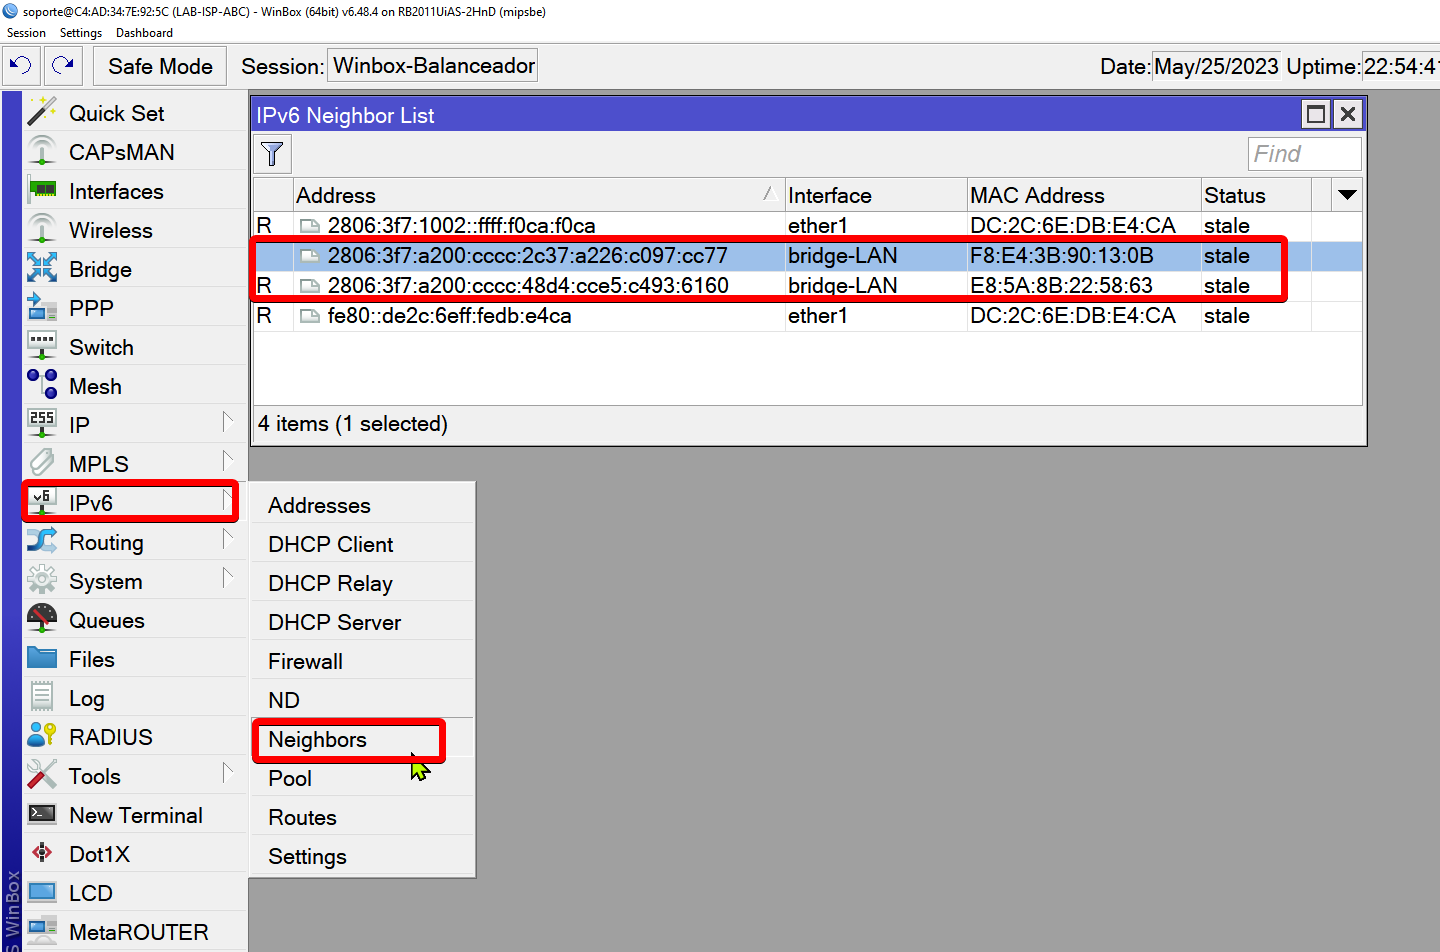
4 Probar la configuración
4.1 Prueba en laptop
4.2 Prueba en celular
4.3 Prueba en el router
OPCIONAL
Configurar IPv4 en el Bridge para tener acceso completo a Internet
- Asignar una IPv4 a la interface Bridge
- Crear un servidor DHCP en la interface Bridge
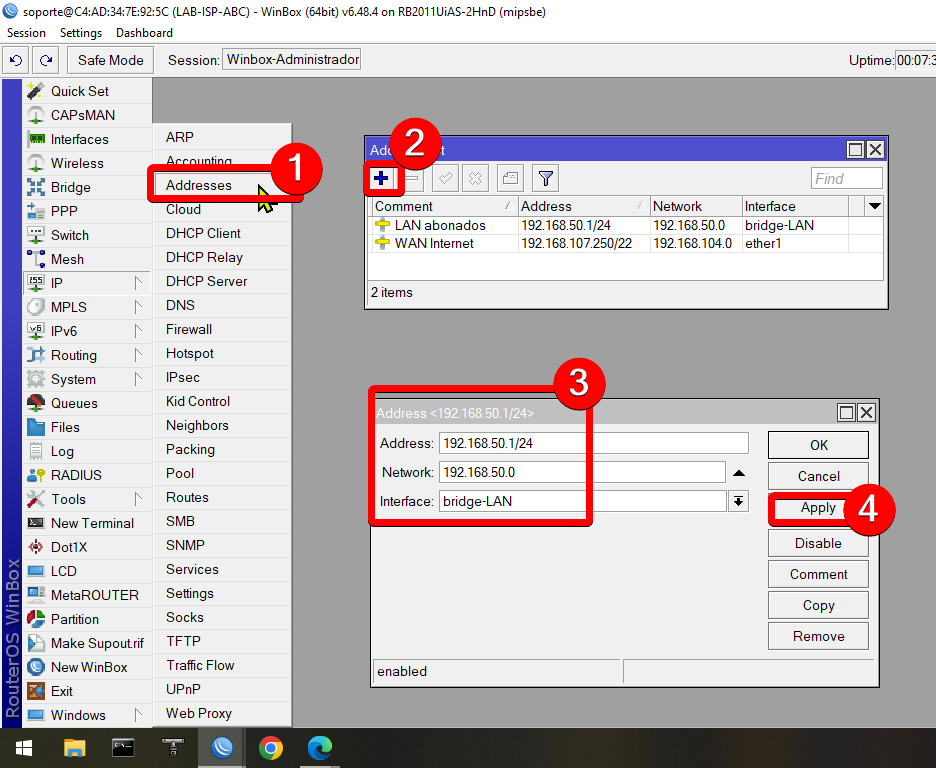
5 Asignar una IPv4 a la Interface Bridge
Código:
/ip address
add address=192.168.50.1/24 comment="LAN abonados" interface=bridge-LAN network=192.168.50.0
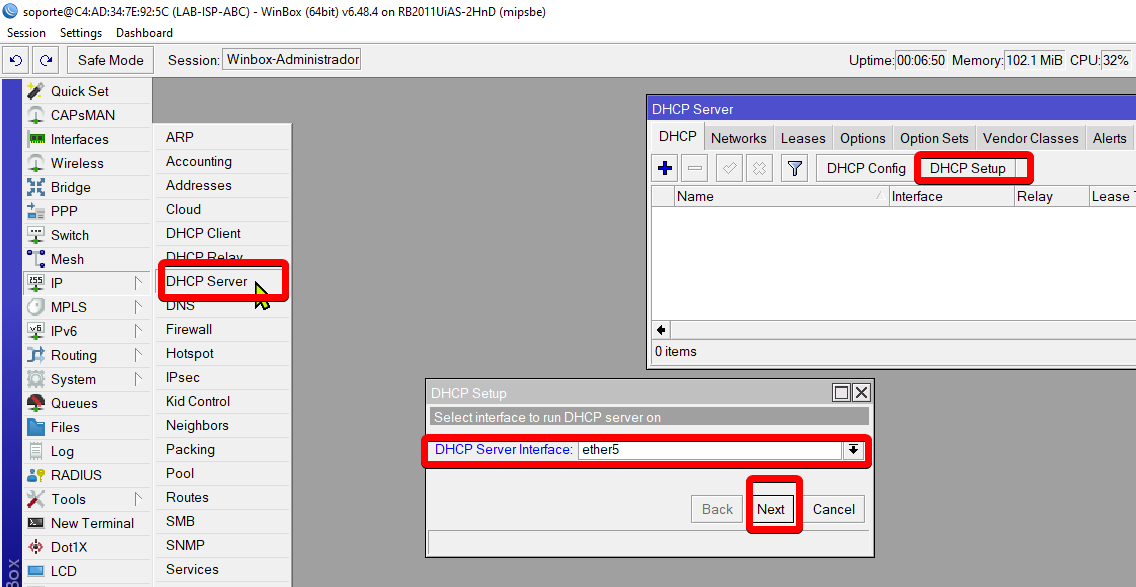
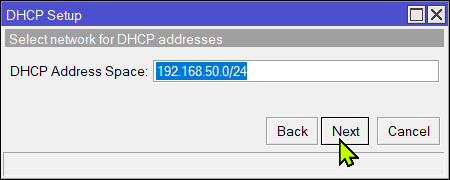
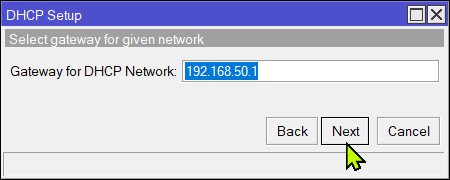
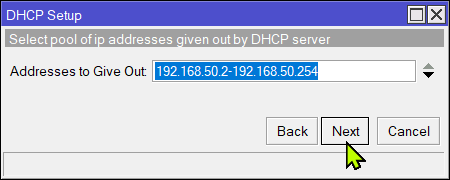
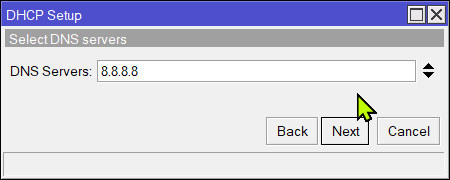
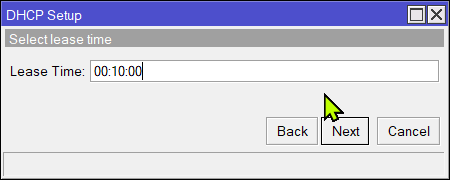
6 Crear un servidor DHCP en la interface Bridge
Solo tenemos que aceptar lo que diga el Wizard (siguiente, siguiente, siquiente) y tener cuidado con la elección de los DNS. En este ejemplo usaremos el de Google 8.8.8.8.
6.1
6.2
6.3
6.4
6.5
6.6
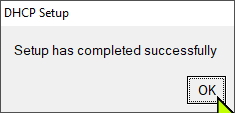
Con esto hemos finalizado. Ahora cuando nos conectemos a la red Wi-Fi nos dará una IPv4 y una IPv6.

 Gracias:
  Me agrada:
  Me desagrada:


 Citar
Citar